Modeling with Collaboration Diagram
The following elements are available in a collaboration diagram.
- Object
- Link
- SelfLink
- Stimulus
- Frame
Object
Procedure for creating object
In order to create Object,
- Click [Toolbox] -> [Collaboration] -> [Object]
button.

- And click at the position where Object will be placed in the [main
window].
- Then quick dialog is shown. At the quick dialog, enter the object name.

- And press [Enter] key.

Procedure for creating outgoing from object stimulus by using shortcut
creation syntax
In order to create outgoing stimulus from selected object to another object,
- Double-click from-object, or select from-object and press [Enter] key to
pop up quick dialog.
- At the quick dialog, enter stimulus name after "->" string
("<-" string for incoming and "<->" for outgoing with return).

- Press [Enter] key and outgoing stimulus from selected object to target
object is created and placed at the last order.

Procedure for setting active object
In order to set class to active object,
- Set assigned class's [IsActive] property to true.

- For MyObject, change MyClass's [IsActive] property.

- If class property is not assigned, you can't change object to active object.
Procedure for setting to multi object
In order to set object to multi object,
- Set object's IsMultiInstance property to true.

- Then the object is assigned as multi object.

Procedure for creating object from class
In order to create object from class,
- Select class in the [model explorer].

- Drag it into collaboration diagram.

- Then the object(instance of the class) is created.

Procedure for creating class from object
If class is not assigned to object,
- Double-click object to pop up quick
dialog. Then quick dialog is opened.
- At the quick dialog, click add class button.

- At the [Enter element name] dialog, enter new class name.

- Then new class is created and assigned to object.

If you want existing class to be assigned to object, enter the existing class
name at the [Select a model element] dialog.
Procedure for adding AttributeLink to object
There are two way to add attribute link to Object.
- using object model in the main diagram or the [model explorer]
- using [collection editor]
In the case of using object model,
- Select object in the [main window] or in the [model explorer].
- Right-click the selected object, select [Add] -> [Attribute Link] popup
menu, and you can add Attribute Link.

- Then new attribute link is created.

In the other case,
- Select [Collection Editor...] popup menu of object or click
 button in [Slots] property on properties
window.
button in [Slots] property on properties
window.

- At slots tab of the [collection editor], you can add attribute link by
using
 button.

Link
Procedure for creating link
In order to create Link,
- Click [Toolbox] -> [Collaboration] -> [Link]
button.

- Drag from one Object and drop to the other Object in the [main
window].

- Between two objects, the link is created.

SelfLink
Procedure for creating self-link
In order to create self-link,
- Click [Toolbox] -> [Collaboration] -> [SelfLink]
button.

- And click the object that self-link will connect to in
the [main window].

Procedure for creating self-stimulus
In order to create self-stimulus,
- Click [Toolbox] -> [Collaboration] -> [ForwardStimulus/ReverseStimulus]
button.

- And click the self-link that the stimulus will be placed in
the [main window].

- And double-click the stimulus, enter the stimulus name at the quick
dialog.

Stimulus
Procedure for creating stimulus
In order to create stimulus,
- Click [Toolbox] -> [Collaboration] -> [ForwardStimulus/ReverseStimulus]
button.

- Click the link that the stimulus will be placed in
the [main window].

- And double-click the stimulus, enter the stimulus name at the quick
dialog.

- The result is as follows.

Procedure for changing ActionKind of stimulus
The [ActionKind] property of stimulus should be assigned to one of five sort as
following. To change [ActionKind] property, select stimulus and select the
[ActionKind] property on the properties window.

| ActionKind |
Shape |
|
CALL |
 |
|
SEND |
 |
|
RETURN |
 |
|
CREATE |
 |
|
DESTROY |
 |
Frame
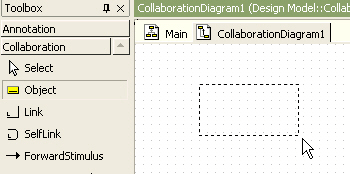
Procedure for creating frame
생성 방법:
In order to create Frame,
- Click [Toolbox] -> [Collaboration] -> [Frame]
button.

- And click at the position where Frame will be placed in the [main
window].

- The result is as follows.

Diagram
Procedure for showing sequence numbers in the diagram
In order to show or hide stimulus sequence number, select the diagram in the
[model explorer] or in the [main window], and configure [ShowSequence] property of
diagram to true or false.

Procedure for changing signature style of message in the diagram
There are four message style. To change stimulus signature,
- Select the
diagram in the [model explorer] or in the [main window].

- And configure [MessageSignature] property of diagram to one of the followings.
| Style |
Description |
|
NONE |
shows only message name
|
|
NAMEONLY |
shows message name and arguement name |
|
TYPEONLY |
shows message name, arguement type, and return type |
|
NAMEANDTYPE |
shows message name, arguement name, arguement type, and return type |